A couple of weeks have flown past without my knowing it — whoops! Funny how time works, but at least I haven’t been idle.
On the contrary — I’ve been hastily taking notes, running trials, and learning from mistakes all this time, without the real ability to sit down and document the adventures in full. So, today I present some brief journal entries from my early forays into dehydration, with more focused posts planned and on the way.
Enjoy!
Trial #1 – Apriums, June 24-25, 2022
All week, I have waited for the opportunity to get started with my new dehydrator, and I finally had time to unbox it the other day.
After a crazy and unexpected few days, I finally mustered up the energy to thoroughly clean off my countertop, wipe down the unit, and prep the fruit for its 8-16 hour experience.
This meant that the process would continue as I slept. A bit of anxiety filled me with that realization. But compared to leaving an oven on all night, the Nesco uses less power, produces less heat, and would sit in an isolated area on the counter.
First: A quick 15-minute test run without any food both rid the thing of any plasticky odors, and also gave me an idea of how loud it was.
(Spoiler alert) It runs more quietly than my vent hood and my dishwasher. Honestly, it’s about the same volume as when my A/C unit runs — that is to say, not that noticeable to me.

Second: I owe a huge shoutout to both Heather and Jess from Morton’s Organic Orchards — y’all are the best! They gave me a great bag of fruit, as well as some advice for when they’re prime for dehydration: slightly squishy and spongy when gently squeezed.
At last, onward to the process!
Per the dehydrator instructions, I needed to cut the apriums into small pieces, spread them out evenly on the trays without crowding or overlapping, and set the temperature for 135°. A rather nebulous note suggested I check them “near the end” and start removing pieces that are dry while allowing the rest to continue.
Considering the time range was 8-16 hours, I found this tidbit decidedly less than helpful. The lower end of eight hours seemed a prudent place to start. So, I set my alarm for 4:30 AM (eeeeewwwwwwwwwww) and made my first check with bleary eyes and a mildly grumpy disposition.
Initially, they seemed to be almost done when I checked the fruit on the top layer. Once I checked the second, I realized what my online resources had meant about “rotating the trays.”
Explanation: the top layer lies closest to the heat, and so dries more quickly. For even drying, I needed to switch the layers throughout the process. As the uppermost fruit only needed a touch more time, and the second required at least another couple of hours, I flipped them, reset the timer for three hours, and promptly flopped back to sleep.
Everything looked much better in the morning!

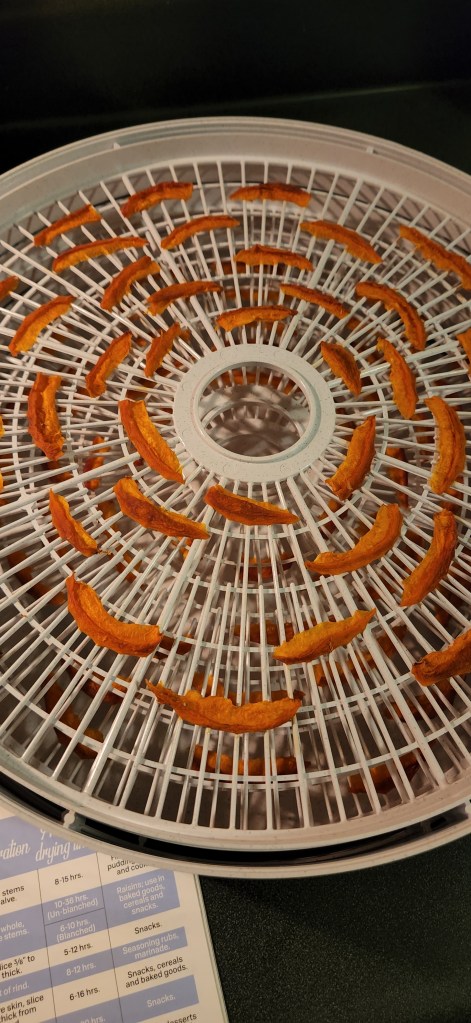
Thanks to slicing the apriums rather thin, they completed the drying cycle in about ten hours. I snapped a couple in half and attempted to see if squeezing them yielded any moisture, per recommendations. I saw none, and I then gave the fruit thirty minutes to cool at room temperature.
Next, I loaded all pieces into a jar I had pre-sanitized and stuck them in the cupboard for conditioning. More on that later.
Round one — success! These didn’t quite crisp like chips, having a touch of flexibility still, but they’re intensely flavorful and have beautiful color.
Trial #2 — Strawberries, June 26, 2022
I am the worst when it comes to strawberries, because as tasty as they are, I forget about them once in a while. Which is a shame, because then they go bad really quickly.
This time, though, I prepared and acted quickly. The day after market, I pulled out my mandoline and sliced the berries into medallions. And then, too late, I realized my mistake — many pieces became too small for the dehydrator, falling through the cracks to the bottom.
However, I remembered the webbed-looking sheets that arrived with the unit, meant for drying finer or smaller pieces such as with herbs or flowers. Might as well see how well they worked, right?
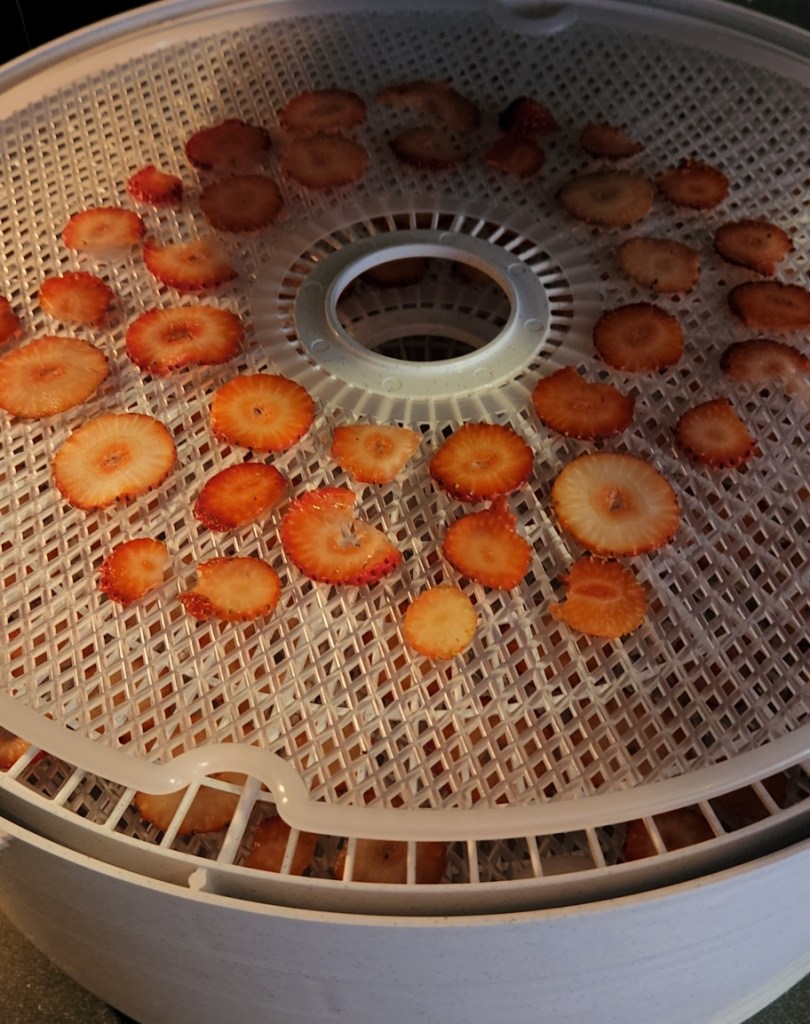
Using those sheets was absolutely the right decision, actually. After about eight hours, I had nearly two trays of tasty strawberry crisps — tasted like candy, really — that I could add to granola and yogurt.
…or I could eat half of them as I added them to a small jar for conditioning. Please don’t judge me. 😇
As the strawberries contained considerably less juice than the apriums and lacked a pit to remove, I found the prep incredibly quick and efficient, especially with the mandoline.
Note to self: I need some sort of glove for the mandoline, as I nearly sliced into my finger during a moment of inattention. No digits were harmed in this endeavor (thank the spaghetti monster), so I quickly learned my lesson without injury. Stay safe!
Learning from the first trial, I did have to switch the trays again, but I set a timer to do so about halfway through the eight hours. This resulted in a more even drying overall.

Trial #3 — Sweet Cherries, June 28-29, 2022
In terms of prep, cherries consume a good amount of time, particularly with a full one pound bag. Washing, slicing in half, and pitting alone took me almost an hour to complete.
Several online warnings noted to place the cherry halves with the skin down to prevent too much juice leak. Luckily, the pieces remained large enough that I could leave them on the base trays — I didn’t need the webbed sheets as with the strawberries.
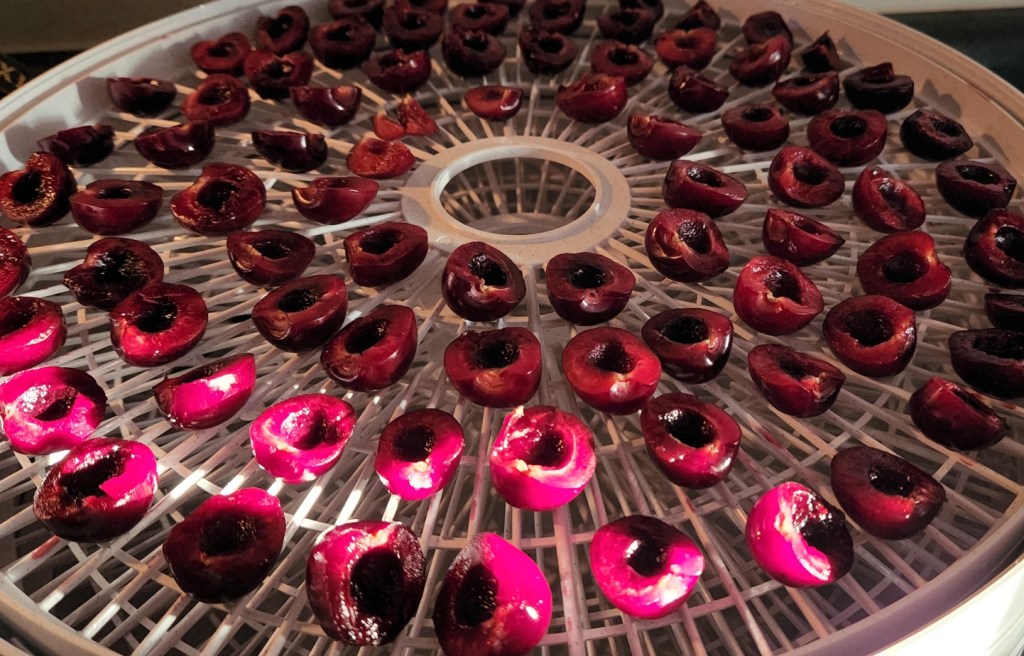
Cherries proved my greatest challenge so far, mostly because of their high sugar content. Their final, dehydrated texture would settle into something like raisins, I had read, though I still needed to check moisture content frequently on all trays. Unlike previous trials, this was one where I had to remove pieces which had dried more quickly, leaving the rest to continue for a few hours longer.
Yes, you can overdry in a dehydrator. It messes with texture and nutritional content, so you have to be mindful of times and temperatures. Once you get the hang of things, you can start to leave the unit to do its own thing. Until then, set timers to check the fruit’s status and adjust your plan accordingly.
While trial three required more time and attention, the dried fruit gained at the end proved well worth the effort. Nearly 24 hours of drying yielded a rather full jar that should last me a few months… if that long.

Early Trials — What I’ve Learned
- Cleanliness really is key. You have to wash the entire dehydrator unit (minus the electrical parts, obviously) after each use. I scrubbed every tray, wiped down the base and lid, and allowed them to fully dry before using again. Unfortunately, this takes a lot of time and space, so I had to time the use of so much counter space carefully.
- You have to rotate the trays. Aim for halfway through if you can. If not, get as close as possible. It’s a bit easier to schedule for fruits and veggies that require a longer drying time.
- Dehydration doesn’t end when you remove the fruit from the unit. I’ll go over the next step in the process, conditioning, in another post.
- Depending on your project, as well as which unit you’re using for dehydration, you can set your time and temperature, press “start,” and just let it go while you’re at work or sleeping. I felt slightlt more comfortable doing so with my Nesco as opposed to the oven!
- Near the end of your scheduled cycle (within the last two hours, I’d say), check your project. If smaller pieces have already dried, set them aside to cool while other pieces continue drying. Do this even if your pieces are cut fairly uniform in size.
Thanks for reading, and for your patience! The blog should return to at least a weekly update now that work things have calmed down a bit. The next post focuses on the next step of dehydration: conditioning!
If you like what you’ve read here, why not donate and sponsor a future project? A little goes a long way in helping these posts come to life! Click here to learn more.

One thought on “Dehydration Trials: A Beginning”